Showing posts with label Android. Show all posts

Monday 11 July 2016

New Features of Android N


Virtual reality In Android N

Virtual Reality is a big piece of the Android N puzzle. Google Has Powered Android 'N' with a new Android-powered platform called Daydream .But that also needs SmartPhone Makers To Upgrade their SmartPhones You Will need a Daydream-certified phone with the required Type of Compatible display and sensors, So that they can work with VR mode in Android

Companies will now have to produce their own headsets that fit the Daydream standard . Samsung, HTC, LG, Xiaomi, Huawei, ZTE, Asus, and Alcatel are providing onboard Daydream-compatible phones.

Keyboard themes! In Android N

Not a Big Features But Style Has also a Importance While Operating OS .
There are a Number of themes available for Google keyboard. You can choose various colors, add or remove the borders between keys, and even set a photo as a backdrop. It’s honestly kind of neat.


Android N Performance Improvements


Google Claimed Performance Improvements in Various Aspects of Android OS , Android N is Improved in various Performance aspects As compared to All Previous Versions . Android N is Using New Graphics API Called Vulkan , Vulkan is also targetted to be used in PC gaming and it provides high visual performance on Tabs and Smartphones performance on phones and tablets.

Android N is Using JIT Compiler . JIT Compiler will help to improve Battery Life

Split Screen In Android N

In Android N you can use Task-Switching Button or you can double-tap it to instantly switch to your most recently used app. Google Named it Quick Switch, you can alsouse Alt-Tab in Android to do this .

Android N supports the split-screen. This Feature is very popular in Multi-Tasking Long pressing on the multitasking button now gives you the open to run two apps side by side on your Android phone. This is very useful for people with Large Screen Smartphones

Better Notifications 

Android N Is no having A new Improved Look For Notifications Panel . If more wider with Small Icons . You Can now Expand Notifications and No need to Swap For taking actions in Notifications panel.  Long pressing on notification for an app will will take you to panel to control how you'll receive alerts from the app in future. You can choose whether to display Notifications for that app or  block them .


New Emonji

Android N is also Have Improved New Emonji Icons .Its have 13 new Emonji


Tuesday 23 December 2014

Pass Data between Activity in Android


Hello Friends ,

Today I got one message from a person to tell him how to pass data between android activities So, I am going to give a simple way for how we can transfer data or how we can pass data across activities in android . In android we use activity for  each layout code .

I am using Mono Android for this article but that will similar functions in Dalvik android that is used with java based android applications .

Here are simple Steps How to Pass data between Activities in Android Using Csharp -

  1. Open Visual Studio . Click on File --> New Project -->
  2. Now choose Mono For Android and click on Android Application . Now Simple Android application will be created
  3. This project will create a single activity named MainActivity (MainActivity.cs), which contains a button.
  4. Add a second New activity class named Activity2 to the project. by right click on Solution Name and click on New then click on Android Activity leave the name as default and click on Ok  This class must inherit from Android.App.Activity .
  5. right click on layout folder inside Resource folder then click new and choose Android Layout give it a name and leave as default and click ok .
  6. In the button.Click handler in MainActivity.cs , create an intent for Activity2 , and add data to the intent by calling PutExtra and this data given in Put Extra will be transfered to Activity2 . Add the Code Below for that :-
 button.Click += delegate {
               // button.Text = string.Format("{0} clicks!", count++);
                var activity2 = new Intent(this, typeof(Activity2));
                activity2.PutExtra("MyData", "Data from Activity1");
                StartActivity(activity2);
            };
      
      7. Now Open you layout.xm file in Resource --> layout folder ( layout folder under resource folder ) . Add code below to it for Adding button under <linearlayout> tag :-

        <Button
        android:id="@+id/MyButton"
        android:layout_width="fill_parent"
        android:layout_height="wrap_content"
        android:text="@string/Hello" />    string text = Intent.GetStringExtra

    8. Now add code below to Newly added Activity - activity2.cs under Activiy.Oncreate Method :-
            ("MyData") ?? "Data not available";
            string text1 = Intent.GetStringExtra("MyData");
            Button button = FindViewById<Button>(Resource.Id.MyButton);
            button.Text = text;

       9. Now Run the app by pressing F5 and see the output in emulator as below -
Pass Data between Activity in android 
10. Now click on button saying "Hello World,Click Me!" Now you will see New Avtivity Activity2 as below that contain the text that we have passed from activity Activity1

Pass Data between Activity in android 


Saturday 25 October 2014

How to use Login Dialog Box in Android Mono C#


For This small demo project we require the following file structure

Main.axml file that contains code for hello world button on which we place button that will further generate the Dialog Box for Login Activity

Main.cs file Now this file will contain the code for Main.axml actions and events

Login.axml file that will contain the code that will contain the style or pattern how the login dialog will look all .axml design code for login form will reside here


AXML Code For Login  Dialog Box  ( login .axml ) file code

Design Look -


It is a simple code that contains a linear layout that will place all controls in linear order as they are placed in it Then we have placed two Edittext for allowing the user to enter username in first and Password in second . Then we have placed two buttons One for login and second for cancellation of login .

<?xml version="1.0" encoding="utf-8"?>
<LinearLayout xmlns:android="http://schemas.android.com/apk/res/android"
    android:orientation="vertical"
    android:layout_height="match_parent"
    android:paddingLeft="10dp"
    android:paddingRight="10dp"
    android:background="#fff"
    android:layout_width="300dp"
    android:paddingTop="10dp">
    <EditText
        android:layout_height="wrap_content"
        android:id="@+id/txtUsername"
        android:layout_width="match_parent">
        <requestFocus />
    </EditText>
    <EditText
        android:layout_height="wrap_content"
        android:inputType="textPassword"
        android:id="@+id/txtPassword"
        android:layout_width="match_parent" />
    <LinearLayout
        android:layout_width="match_parent"
        android:layout_height="wrap_content"
        android:id="@+id/linearLayout1">
        <Button
            android:layout_width="wrap_content"
            android:layout_height="wrap_content"
            android:layout_weight="0.5"
            android:id="@+id/btnLogin"
            android:text="Login" />
        <Button
            android:layout_width="wrap_content"
            android:layout_height="wrap_content"
            android:layout_weight="0.5"
            android:id="@+id/btnCancel"
            android:text="Cancel" />
    </LinearLayout>
</LinearLayout>

XAML code for Main .axml file 

Design Look -


<?xml version="1.0" encoding="utf-8"?>
<LinearLayout xmlns:android="http://schemas.android.com/apk/res/android"
    android:orientation="vertical"
    android:layout_height="match_parent"
    android:paddingLeft="10dp"
    android:paddingRight="10dp"
    android:background="#fff"
    android:layout_width="300dp"
    android:paddingTop="10dp">
 
        <Button
            android:layout_width="wrap_content"
            android:layout_height="wrap_content"
            android:layout_weight="0.5"
            android:id="@+id/hello"
            android:text="Hello world!" />
 
</LinearLayout>


C# Code for Main.cs file 


 protected override void OnCreate(Bundle bundle)
{
 base.OnCreate(bundle);
 SetContentView(Resource.Layout.Main);
 TextView hellobtn = FindViewById<TextView>(Resource.Id.hello);
 hellobtn.Click += btnclick;
}

void btnclick(object sender, EventArgs e)
        {

            Dialog login = new Dialog(this);
            login.SetContentView(Resource.Layout.login);
            login.Show();
}

Explanation of Code 

PART I

protected override void OnCreate(Bundle bundle)
{
 base.OnCreate(bundle);
 SetContentView(Resource.Layout.Main);
 TextView hellobtn = FindViewById<TextView>(Resource.Id.hello);
 hellobtn.Click += loginclick;
}

In above code First i have used OnCreate Method that is startup method when an android application starts it first load up everything in OnCreate Method and Create their space in memory

SetContentView(Resource.Layout.Main);

Then at this line i have set what layout will this code is meant for I have choosen Main layout in Resource folder whose design preview is shown in images above

 Button loginbtn = FindViewById<Button>(Resource.Id.btnLogin);

Then at this line i have made instance of button and set that textview to the hello world button that i have placed on Main form I have used FindviewById method to find the button and then assign that button to hellobtn

Then at this line i have assigned click event to button by using following line of code

 hellobtn.Click += btnclick;

Then i have given definition to btnclick funtion in code below

PART I

void btnclick(object sender, EventArgs e)
        {

            Dialog login = new Dialog(this);
            login.SetContentView(Resource.Layout.login);
            login.Show();
}

In this code i have made Instance of Dialog class for showing dialog box on screen i have created new class instance then i have set what view will be shown on dialog that is going to appear i have set the view contentview to login.axml content view that i have designed earlier in this article then i have used show( ) function to show login dialog box


Tuesday 29 July 2014

How to use XML Parsing And TableLayout in Mono Android


In order to start with XML Parsing or XML data Handling in Microsoft .NET Framework first we need to know about what classes or namespaces are available to us for using or dealing with XML Document or XML Data in .Net So Here is list of XML Namespaces available for XML Processing and Handling :-


  • System.Xml;
  • System.Schema;
  • System.Xml.Serialization;
  • System.Xml.XPath;
  • System.Xml.Xsl;


Here , Out of these classes System.Xml class is major class that is responsible or must for XML Data Processing and this is the namespace that we are going to use in our tutorial today . The System.Xml namespace contains number of classes that are used for reading and writting Xml data from XML Documents . System.Xml contains :-


  • XmlReader for Reading Xml Documents we are not going to use it in our tutorial today
  • XmlWritter For Writting Xml Documents we are not going to use it in our tutorial today

There is another important class that we will use in our XML Parsing today . This is XmlNode It plays important role for getting xml data node by node This class represents every single node of the XML Document


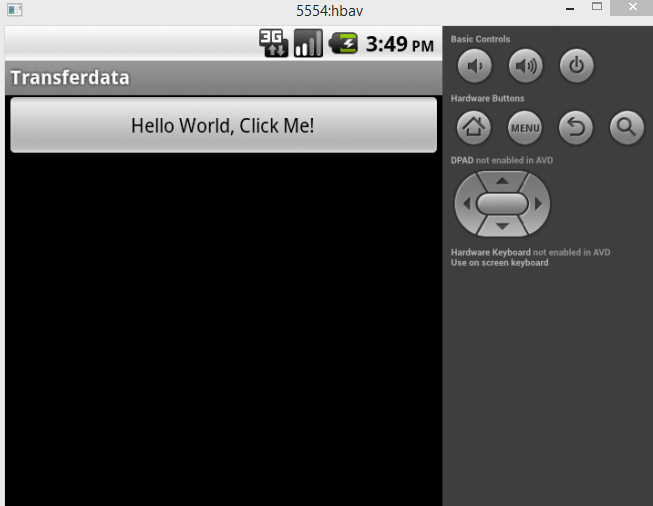
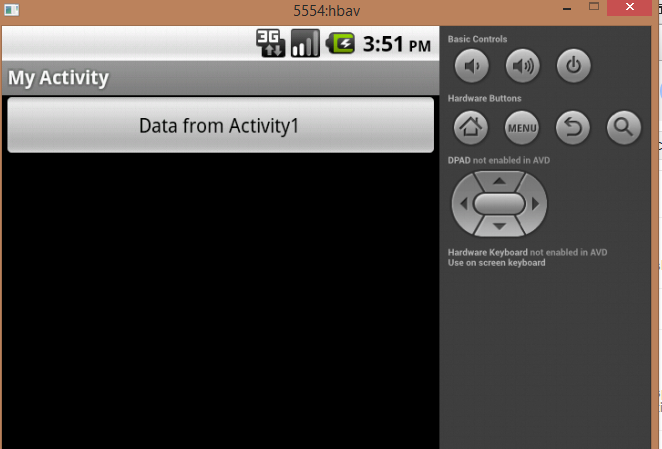
OUTPUT SCREEN WITH RESULT 
I have used API 8 for building this app you Download the Application complete code from here :-
Download Xml Parser Android with TableLayout -- geeksprogrammings


Main.Xaml CODE MONO ANDROID

<?xml version="1.0" encoding="utf-8"?>
<LinearLayout xmlns:android="http://schemas.android.com/apk/res/android"
    android:layout_width="match_parent"
    android:layout_height="match_parent"
    android:layout_gravity="center_horizontal"
    android:orientation="vertical">
    <TableLayout
        android:id="@+id/main_table"
        android:layout_weight="1"
        android:layout_height="wrap_content"
        android:layout_width="match_parent"
        android:layout_marginTop="0.0dp"
        android:scrollbars="vertical" />
</LinearLayout>

using System;
using Android.App;
using Android.Content;
using Android.Runtime;
using Android.Views;
using Android.Widget;
using Android.OS;
using Android.Graphics;
using System.Xml;

XAML CODE EXPLANATION MONO ANDROID

step 1
In first line i have declared the xml version and encoding type this denotes that  this is an xml file code . In android xml code is used for creating design or layout of mono Android Apps

step 2
Now We have added a Linear Layout this is a default layout for Mono Android Application all controls or other layouts that we will use in our Mono Android Application will reside under this LinearLayout Tag
It contains Starting and Ending Tag .

<LinearLayout xmlns:android="http://schemas.android.com/apk/res/android"
    android:layout_width="match_parent"
    android:layout_height="match_parent"
    android:layout_gravity="center_horizontal"
    android:orientation="vertical">

</LinearLayout>

step 3
Now Under LinearLayout we have included a Table layout We have included Table layout because we in this tutorial of xml parsing is going to parse xml and then view the retrieved xml data in table view . We have used following code for styling or placing table layout

<TableLayout
        android:id="@+id/main_table"
        android:layout_weight="1"
        android:layout_height="wrap_content"
        android:layout_width="match_parent"
        android:layout_marginTop="0.0dp"
        android:scrollbars="vertical" />


Csharp Code For XML Parsing MONO ANDROID

namespace AndroidApplication5
{
    [Activity(Label = "AndroidApplication5", MainLauncher = true, Icon = "@drawable/icon")]
    public class Activity1 : Activity
    {
        int count = 1;

        protected override void OnCreate(Bundle bundle)
        {
            base.OnCreate(bundle);
            SetContentView(Resource.Layout.Main);

            XmlDocument doc = new XmlDocument();
            doc.LoadXml("<Product>    <ID>1</ID>    <SeqNo>1</SeqNo>    <Stage>Stage</Stage> <Observation>Observation</Observation><CHK></CHK> </Product>");
   
            XmlNode node = doc.DocumentElement.SelectSingleNode("/Product/ID");
            XmlNode node1 = doc.DocumentElement.SelectSingleNode("/Product/SeqNo");
            XmlNode node2 = doc.DocumentElement.SelectSingleNode("/Product/Stage");
            XmlNode node3 = doc.DocumentElement.SelectSingleNode("/Product/Observation");
            XmlNode node4 = doc.DocumentElement.SelectSingleNode("/Product/CHK");

            TableLayout ll = FindViewById<TableLayout>(Resource.Id.main_table);
         
     
            for (int i = 0; i < 10; i++)
            {
                TableRow row = new TableRow(this);
                TableRow.LayoutParams lp = new TableRow.LayoutParams(TableRow.LayoutParams.FillParent);
             
                row.LayoutParameters = lp;
                row.SetGravity(GravityFlags.CenterHorizontal);
             
            TextView checkBox = new TextView(this);
             TextView   tv = new TextView(this);
             TextView addBtn = new TextView(this);
             TextView rcf = new TextView(this);
             CheckBox verified = new CheckBox(this);
             TextView ver = new TextView(this);
             TextView    qty = new TextView(this);
             
                if (i == 1)
                {
                    checkBox.Text = node.Name.ToUpper().ToString();
                    checkBox.SetBackgroundColor(Color.AliceBlue);
                    checkBox.SetTextColor(Color.Black);
                    checkBox.SetPadding(7,9,7,9);

                    qty.Text = node1.Name.ToUpper().ToString();
                    qty.SetBackgroundColor(Color.AliceBlue);
                    qty.SetTextColor(Color.Black);
                    qty.SetPadding(7, 9, 9, 9);

                    tv.Text = node2.Name.ToUpper() .ToString();
                    tv.SetBackgroundColor(Color.AliceBlue);
                    tv.SetTextColor(Color.Black);
                    tv.SetPadding(7, 9, 9, 9);

                    addBtn.Text = node3.Name.ToUpper().ToString();
                    addBtn.SetBackgroundColor(Color.AliceBlue);
                    addBtn.SetTextColor(Color.Black);
                    addBtn.SetPadding(9, 9, 9, 9);

                    ver.Text = node4.Name.ToUpper().ToString();
                    ver.SetBackgroundColor(Color.AliceBlue);
                    ver.SetTextColor(Color.Black);
                    ver.SetPadding(9, 9, 9, 9);
                 
                }
                else if (i == 0)
                {
                    checkBox.Text = "Inspection";
                    checkBox.SetBackgroundColor(Color.AliceBlue);
                    checkBox.SetTextColor(Color.Black);
                    checkBox.SetPadding(9, 9, 9, 9);

                    qty.Text = "Details";
                    qty.SetBackgroundColor(Color.AliceBlue);
                    qty.SetTextColor(Color.Black);
                    qty.SetPadding(9, 9, 9, 9);

                    tv.Text = "Rail";
                    tv.SetBackgroundColor(Color.AliceBlue);
                    tv.SetTextColor(Color.Black);
                    tv.SetPadding(9, 9, 7, 9);

                    addBtn.Text = "Coach";
                    addBtn.SetBackgroundColor(Color.AliceBlue);
                    addBtn.SetTextColor(Color.Black);
                    addBtn.SetPadding(7, 9, 9, 9);

                    ver.Text = "";
                    ver.SetBackgroundColor(Color.AliceBlue);
                    ver.SetTextColor(Color.Black);
                    ver.SetPadding(9, 9, 9, 9);
                }
                else
                {
                    checkBox.Text = (i-1).ToString();
                    checkBox.SetBackgroundColor(Color.Black);
                    checkBox.SetTextColor(Color.White);
                    checkBox.SetPadding(7,9,9,9);

                    qty.Text = (i - 1).ToString();
                    qty.SetBackgroundColor(Color.Black);
                    qty.SetTextColor(Color.White);
                    qty.SetPadding(7,9,9,9);

                    tv.Text = node2.InnerText+(i-1).ToString ();
                    tv.SetBackgroundColor(Color.Black);
                    tv.SetTextColor(Color.White);
                    tv.SetPadding(9, 9, 9, 9);

                    addBtn.Text = node3.InnerText + (i-1).ToString();
                    addBtn.SetBackgroundColor(Color.Black);
                    addBtn.SetTextColor(Color.White);
                    addBtn.SetPadding(9, 9, 9, 9);
                    verified.Checked = true;
                }

                checkBox.Gravity = GravityFlags.CenterHorizontal;
                tv.Gravity = GravityFlags.CenterHorizontal;
                qty.Gravity = GravityFlags.CenterHorizontal;
                addBtn.Gravity = GravityFlags.CenterHorizontal;

                row.AddView(checkBox);
                row.AddView(qty);
                row.AddView(tv);
                row.AddView(addBtn);

                if (i == 1)
                {
                    row.AddView(ver);
                }
                else if(i>1)
                {
                    row.AddView(verified);

                }
                ll.AddView(row, i);
            }
   
   }
            }
    }

CsharpCode Explanation For XML Parsing MONO ANDROID

step1 

we start with main login of xml parsing that we are covering in our this tutorial here we have first include System.Xml namespace at top of our code document then we have used a XmlDocument class by making an instance of that class then we have passed the static Xml data to instance of XmlDocument by using LoadXml class that receives the xml data . you can see code below :-

 XmlDocument doc = new XmlDocument();
            doc.LoadXml("<Product>    <ID>1</ID>    <SeqNo>1</SeqNo>    <Stage>Stage</Stage> <Observation>Observation</Observation><CHK></CHK> </Product>");

Step 2

After passing the xml data now we are going to filter the xml data with respect to nodes of xml In our xml data Product is Parent node and it contains other child node like ID,SeqNo ..........
As we have loaded the xml data in doc we have used doc.Documentelement.SelectSingleNode that will select the single node of 'ID' that is child of Parent node 'Product'
You can see the code below :-

            XmlNode node = doc.DocumentElement.SelectSingleNode("/Product/ID");
            XmlNode node1 = doc.DocumentElement.SelectSingleNode("/Product/SeqNo");
            XmlNode node2 = doc.DocumentElement.SelectSingleNode("/Product/Stage");
            XmlNode node3 = doc.DocumentElement.SelectSingleNode("/Product/Observation");
            XmlNode node4 = doc.DocumentElement.SelectSingleNode("/Product/CHK");

step 3

With these lines of code below we are select the table layout that we have added in our xml code in layout file . You can see the code below :-

            TableLayout ll = FindViewById<TableLayout>(Resource.Id.main_table);

Step 4

This is main logic of code where we are reading xml data and then adding dynamic rows to table layout

 for (int i = 0; i < 10; i++)    // starting loop form 0 -9 to display 10 rows in table dynamically
            {
//creating a new tablerow
                TableRow row = new TableRow(this);    

//Setting tablerow hight , width parameters
                TableRow.LayoutParams lp = new   TableRow.LayoutParams(TableRow.LayoutParams.FillParent);
             
assigning the layoutparameters to row
                row.LayoutParameters = lp;

//setting row to alignment to center horizontal
                row.SetGravity(GravityFlags.CenterHorizontal);
             
//Adding some required TextView
            TextView checkBox = new TextView(this);
             TextView   tv = new TextView(this);
             TextView addBtn = new TextView(this);
             TextView rcf = new TextView(this);
             CheckBox verified = new CheckBox(this);
             TextView ver = new TextView(this);
             TextView    qty = new TextView(this);
             
                if (i == 1)        // this is for second row of table to display column names not values
                {
                    checkBox.Text = node.Name.ToUpper().ToString();
                    checkBox.SetBackgroundColor(Color.AliceBlue);
                    checkBox.SetTextColor(Color.Black);
                    checkBox.SetPadding(7,9,7,9);

                    qty.Text = node1.Name.ToUpper().ToString();
                    qty.SetBackgroundColor(Color.AliceBlue);
                    qty.SetTextColor(Color.Black);
                    qty.SetPadding(7, 9, 9, 9);

                    tv.Text = node2.Name.ToUpper() .ToString();
                    tv.SetBackgroundColor(Color.AliceBlue);
                    tv.SetTextColor(Color.Black);
                    tv.SetPadding(7, 9, 9, 9);

                    addBtn.Text = node3.Name.ToUpper().ToString();
                    addBtn.SetBackgroundColor(Color.AliceBlue);
                    addBtn.SetTextColor(Color.Black);
                    addBtn.SetPadding(9, 9, 9, 9);

                    ver.Text = node4.Name.ToUpper().ToString();
                    ver.SetBackgroundColor(Color.AliceBlue);
                    ver.SetTextColor(Color.Black);
                    ver.SetPadding(9, 9, 9, 9);
                 
                }
                else if (i == 0)      //this is for first row to display Heading
                {
                    checkBox.Text = "Inspection";
                    checkBox.SetBackgroundColor(Color.AliceBlue);
                    checkBox.SetTextColor(Color.Black);
                    checkBox.SetPadding(9, 9, 9, 9);

                    qty.Text = "Details";
                    qty.SetBackgroundColor(Color.AliceBlue);
                    qty.SetTextColor(Color.Black);
                    qty.SetPadding(9, 9, 9, 9);

                    tv.Text = "Rail";
                    tv.SetBackgroundColor(Color.AliceBlue);
                    tv.SetTextColor(Color.Black);
                    tv.SetPadding(9, 9, 7, 9);

                    addBtn.Text = "Coach";
                    addBtn.SetBackgroundColor(Color.AliceBlue);
                    addBtn.SetTextColor(Color.Black);
                    addBtn.SetPadding(7, 9, 9, 9);

                    ver.Text = "";
                    ver.SetBackgroundColor(Color.AliceBlue);
                    ver.SetTextColor(Color.Black);
                    ver.SetPadding(9, 9, 9, 9);
                }
//else is used for all other rows to be added dynamically except 0,1 row
                else
                {
                    checkBox.Text = (i-1).ToString();
                    checkBox.SetBackgroundColor(Color.Black);
                    checkBox.SetTextColor(Color.White);
                    checkBox.SetPadding(7,9,9,9);

                    qty.Text = (i - 1).ToString();
                    qty.SetBackgroundColor(Color.Black);
                    qty.SetTextColor(Color.White);
                    qty.SetPadding(7,9,9,9);

                    tv.Text = node2.InnerText+(i-1).ToString ();
                    tv.SetBackgroundColor(Color.Black);
                    tv.SetTextColor(Color.White);
                    tv.SetPadding(9, 9, 9, 9);

                    addBtn.Text = node3.InnerText + (i-1).ToString();
                    addBtn.SetBackgroundColor(Color.Black);
                    addBtn.SetTextColor(Color.White);
                    addBtn.SetPadding(9, 9, 9, 9);
                    verified.Checked = true;
                }

                checkBox.Gravity = GravityFlags.CenterHorizontal;
                tv.Gravity = GravityFlags.CenterHorizontal;
                qty.Gravity = GravityFlags.CenterHorizontal;
                addBtn.Gravity = GravityFlags.CenterHorizontal;

                row.AddView(checkBox);
                row.AddView(qty);
                row.AddView(tv);
                row.AddView(addBtn);

                if (i == 1)
                {
                    row.AddView(ver);
                }
                else if(i>1)
                {
                    row.AddView(verified);

                }
                ll.AddView(row, i);
            }